Mortar joints generally last between 20 to 30 years before requiring replacement, depending on weather conditions and maintenance.
Brick walls and chimneys are built to last, but without proper maintenance, the mortar joints holding them together can deteriorate. This can lead to expensive repairs. This is where tuckpointing comes in. But can you tuckpoint yourself, or is it best left to the professionals? The answer depends on your skill level, patience, and willingness to do detailed work. In my experience, you need all three to get the job done right!
Tuckpointing is a crucial repair technique that not only enhances the appearance of brickwork but also extends the life of masonry structures. While DIY tuckpointing is possible, there are challenges, costs, and risks to consider. In this guide, we’ll break down everything you need to know—when tuckpointing is needed, the tools required, step-by-step instructions, and whether you should tackle it yourself.
What is Tuckpointing?
Tuckpointing is the process of removing and replacing deteriorated mortar joints between bricks. Over time, weather, moisture, and structural stress break down mortar, weakening the brickwork. If ignored, it can lead to water infiltration, structural instability, and costly restorations.
By carefully grinding out the old mortar and applying new, color-matched mortar, tuckpointing restores the strength and appearance of brick walls or chimneys. It’s a routine but essential maintenance task that can prevent thousands of dollars in future damage. I’ve seen what should have been a simple repair turn into a thousand-dollar repair because of lack of maintenance throughout the years.
Is Tuckpointing a DIY Job?
For homeowners considering doing their own tuckpointing repairs, there are a lot of things to consider. This is no easy task and many tuckpointers have over a decade of experience under their belt. If you have the patience, willingness to learn and the time to do it then tuckpointing yourself can be doable. If you are worried about making a mistake or causing more damage along the way, then follow the tips in this guide to keep you on the right track.
Is Tuckpointing Difficult?
Yes, tuckpointing is difficult for beginners. While the process seems straightforward, it requires precision, the right tools, and knowledge of masonry materials. A poor tuckpointing job can lead to weak joints, mismatched colors, and an uneven finish that diminishes the home’s aesthetic appeal. I have been tuckpointing for over 12 years professionally and when starting out, it can be a grueling learning experience. It is best to have a professional teach you the ropes before tackling it head-on.
Here’s why tuckpointing can be a challenge:
- Matching mortar color: If the new mortar doesn’t match the existing one, the repair will be obvious and unattractive.
- Proper depth and application: If the mortar isn’t packed tightly, it can weaken and crack prematurely.
- Clean finish: Professional tuckpointers use specialized tools to create smooth, uniform joints that last decades.
Common Mistakes to Avoid
Whenever you learn a new skill, it can be difficult to avoid common mistakes. I have been personally doing tuckpointing for the past 12 years and I had to learn the hard way sometimes when first starting out. If you decide to tuckpoint yourself, beware of these common mistakes:
Removing too much mortar
This can damage the bricks and make the repair unstable. Always make sure that the surrounding brick is stable enough to withstand the extra stress. The last thing you want is to have surrounding brick collapse.
Using incorrect mortar
The wrong mix can weaken the structure and cause cracking. There are many different mortar types to choose from. Picking the right one can make all the difference.
Applying too much water
Overwatering mortar weakens its strength and bonding ability. Having the right consistency makes it much easier to apply and helps you not make as much of a mess as well.
Rushing the job
Tuckpointing requires patience. A sloppy job will be noticeable and may fail sooner. One of the best advice I got early on is to take my time to make sure the job was done right. Rushing the job also makes you more likely to accidently get mortar all over the brick face, which looks really ugly.

What Happens if the Tuckpointing Quality is Low?
Always take pride in the work that you do. If you are unsure that you can do a quality job, then it is best to leave it to the professionals like us. Poor-quality tuckpointing can have serious consequences:
Faster deterioration
Weak mortar fails quickly, leading to repeated repairs. The worst feeling is knowing you have to redo one of your own repairs. Unfortunately, it is usually apart of the learning process for acquiring new skills.
Water infiltration
Gaps or poorly packed joints let moisture in, which can lead to internal damage. Water damage can lead to mold and deterioration inside your home.
Higher repair costs
Fixing a bad tuckpointing job often costs more than hiring a professional in the first place. Most of the time, the mortar that they get all over the brick face cannot be removed, which can be unsightly. It is best to get the job done right the first time to limit the repair costs all together.
While DIY tuckpointing can be a temporary fix, professional tuckpointing in St. Louis ensures long-lasting results with expert mortar matching and durable repairs.
What Are the Steps Involved in Successful Tuckpointing?
If you’re committed to learning how to tuckpoint yourself, follow these steps:
Prepare the Area
Use a joint raker or grinder to remove damaged mortar (about 1/2 to 3/4 inch deep). Dont just add mortar on top of cracks without there being proper joint depth. If there isn’t enough joint depth, the new mortar will fall out much sooner than you expect.
Clean the Joints
Brush away dust and debris to ensure proper mortar adhesion. Without doing this, you may not get proper adhesion which can lead to a failed repair down the road.
Mix the Mortar
Use a mortar mix that closely matches the existing mortar color and texture. You can use mortar dyes that can help you match homes that have tan mortar or even red mortar. You want to make sure your new repair blends well with the existing brickwork.
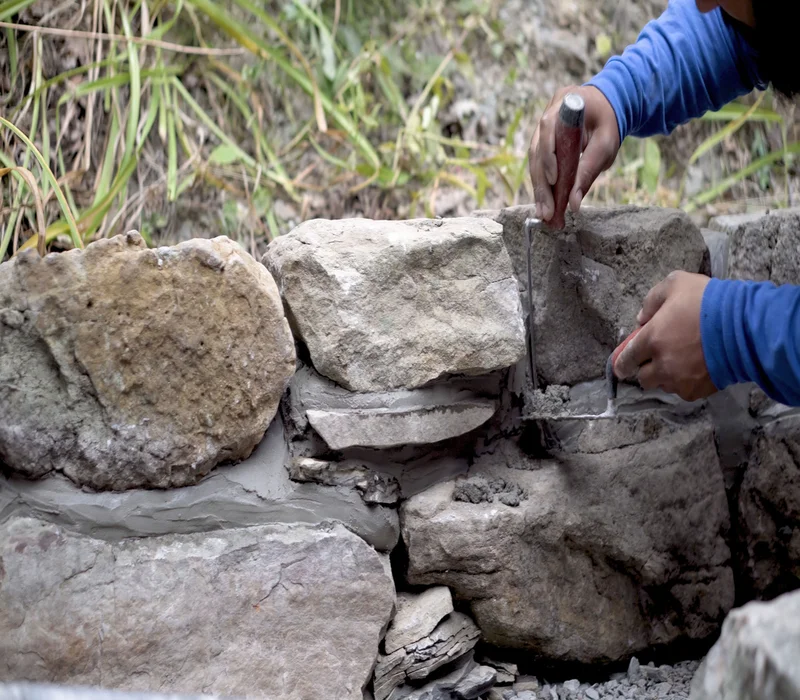
Fill the Joints
Apply mortar using either a masonry grout bag or a pointing trowel, ensuring a firm, even fill.
Smooth and Tool the Mortar
Shape the joints using a jointer or pointing tool for a clean finish. Don’t just use your finger, trust me on that one. Using the proper tool can make your life so much easier and get you a better repair in the long run.
Cure and Seal
Allow the mortar to dry for at least 24 hours before sealing it to protect against water damage. Depending on the weather and humidity, you may want to give it even more time.
Following these steps carefully can ensure a longer-lasting repair.
Materials Needed
Before starting, gather the right materials. Having the correct tools and safety equipment is essential for a professional finish.
Masonry Mortar Mix
Use Type N or Type S mortar depending on your project. Type N is common for walls, while Type S is stronger and used for chimneys.
Ensure the mix matches your existing mortar in color and composition.
Tuckpointing Tools
- Trowel & Pointing Tool – For precise mortar application.
- Masonry Grinder or Joint Raker – To remove old mortar cleanly.
- Masonry Brush – For cleaning joints.
- Mortar Bag – For holding and applying mortar.
Safety Equipment
- Gloves – Protect hands from abrasions.
- Goggles – Prevent dust from entering your eyes.
- Dust Mask – Essential when grinding out mortar.

How Much Does Tuckpointing Cost?
If your project is small, DIY might save you money. But for larger jobs, a professional tuckpointer is often worth the cost.
DIY cost:
$50 to $500, depending on tools and materials.
Professional tuckpointing:
The average cost of tuckpointing can range anywhere between $5 to $25 per square foot.
Full house tuckpointing:
Cost estimates show that tuckpointing a full two-story house can range from $10,000 to $50,000, according to industry data.
Related article: Masonry repair costs exposed – what you must know.
Can Tuckpointing Be Done in the Winter?
Technically, yes, but it’s not ideal. Cold temperatures affect mortar curing. If the mortar freezes before it sets, it will crack and weaken.
To tuckpoint in winter:
- Use a cold-weather mortar mix with anti-freeze additives.
- Work in a heated enclosure to maintain proper temperature.
- Keep the joints covered to prevent freezing.
For best results, tuckpoint in spring or fall when temperatures are moderate.
Related article: Can you do tuckpointing in the winter.
Maintenance Tips for Tuckpointing
To extend the life of your tuckpointing work:
✔ Inspect joints annually for cracks or crumbling.
✔ Clean brickwork regularly with non-acidic cleaners.
✔ Seal mortar joints to prevent moisture damage.
✔ Repair minor issues early to avoid costly repairs later.
A little maintenance goes a long way in preserving your masonry.

Tips for Hiring a Professional Tuckpointing Mason
If you decide not to tuckpoint yourself, hiring the right mason is crucial. Here’s how to find a pro:
✔ Check their portfolio – Look for past tuckpointing work, especially color-matching jobs.
✔ Ask about experience – Not all masons specialize in tuckpointing.
✔ Request multiple quotes – Compare prices to ensure you’re getting a fair deal.
✔ Look for warranties – Reputable tuckpointers guarantee their work.
Hiring an expert ensures that the job is done correctly and lasts for decades.
Final Thoughts: Should You Tuckpoint Yourself?
If you’re patient, precise, and willing to invest in the right tools, a small tuckpointing job might be within your skillset. But if you want seamless results, lack experience, or need extensive repairs, hiring a professional is usually the smarter choice.
Regardless of which route you take, maintaining your masonry is key to avoiding major structural issues. Whether you do it yourself or call a pro, tuckpointing is an investment that preserves the integrity of your home for years to come.
For more home improvement and masonry tips, check out our blog. If you’d rather leave the tuckpointing to an expert, schedule a free estimate with us today!